
DIY Wood Ottoman
If you're new here, hi! I'm Brooke and I always love an easy DIY. My house is always changing in decor thanks to a new addition, my one year old son. Ha! I use to have this pretty gold, metal, three leg table, but quickly realized that a small human can EASILY tip it and it's metal..so it'll hurt. I immediately started searching for a table/foot stool, because my husband was always saying how he couldn't put his feet up on the table, but my oldest was always snacking on the old table. Just trying to please both of them and with that I found an ottoman online that was pretty and matched my style, good to put your feet on and eat a snack. The problem was it was $300.. I always seem to pick the MOST expensive items. Anyone else!?
That's where this DIY comes in. Below is the list of things you'll need!
WHAT YOU’LL NEED:
ALREADY HAD:
- Stain
- Washers
- 3" Screws
- Fabric
- Foam Padding
- Staple Gun & 3/8" Staples
- Thin Wood for the fabric top. I used an old 1/4” wood board and cut it into a 24” round.
- Jig Saw if you're cutting the round for the fabric or posts.
PURCHASED:
- 1"x24" Pine Round: https://www.lowes.com/pd/Radius-Edge-Unfinished-Pine-Board/5002042001
- .125"x6" Wood Legs or what I ended up using these wood spindles! I'm thinking of buying this from Lowe's. Any recommendations? https://www.lowes.com/pd/Severe-Weather-Common-2-1-4-in-x-2-1-4-in-x-36-in-Actual-1-75-in-x-1-75-in-x-35-75-in-Pressure-Treated-Brown-Pine-Deck-Spindle/50279753
Total Cost: $60+tax
STEP 1:
Find the center of your 24” rounds and from there you can draw out points to place your posts. I don't have a photo of this, but take a measuring tape, find the center of 24 (12) and then mark it on your wood round. Make sure to do that to both of your rounds!
STEP 2:
Now that you know where your four posts need to go it's time to attach them! Now, I decided to use wood spindles that were 34” so I had to cut them down to my desired size, but you can buy ready to go table legs at your desired size and skip that part. I always pre-drill holes so I know exactly where I need to screw into and it makes sure that the wood doesn't split. First, I'll pre-drill holes into the posts and then the wood rounds. Once I have them all ready I'll screw them all together! I mean really, this is the easiest thing ever.. Then you can stain it!

STEP 3:
This is where the hard part comes in. Fabric. Honestly, you could leave the table with a plain wood top and call it a day, but I wanted it to have a cushion top. I started out by using an old 1/4” board and cutting it to a 24” round. I then took my foam top and spray glued it down the the round. THEN, I simply took the fabric, using my staple gun, and stapled it down to the round!

STEP 4:
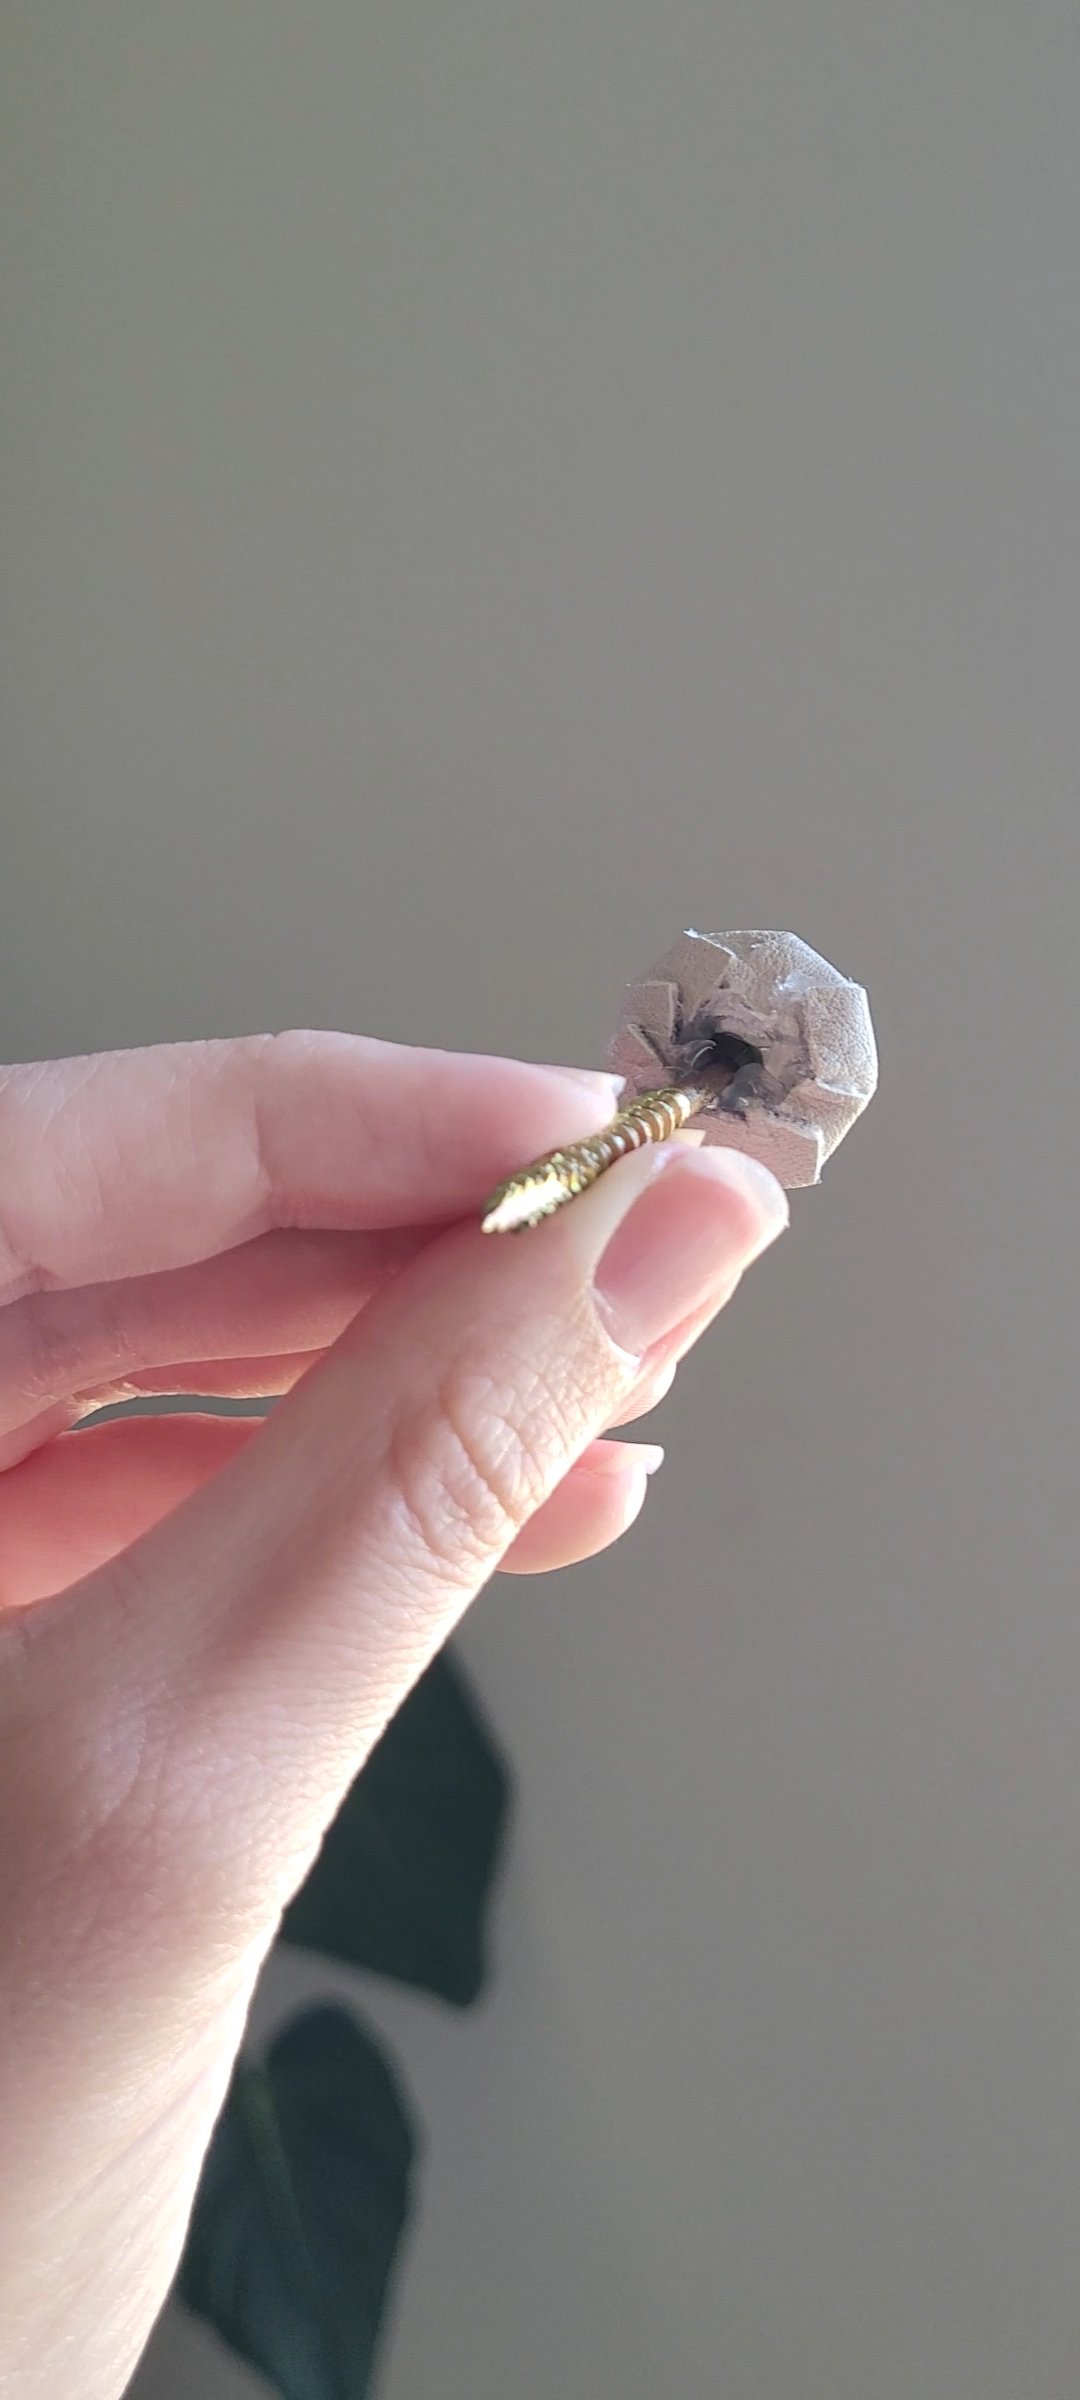
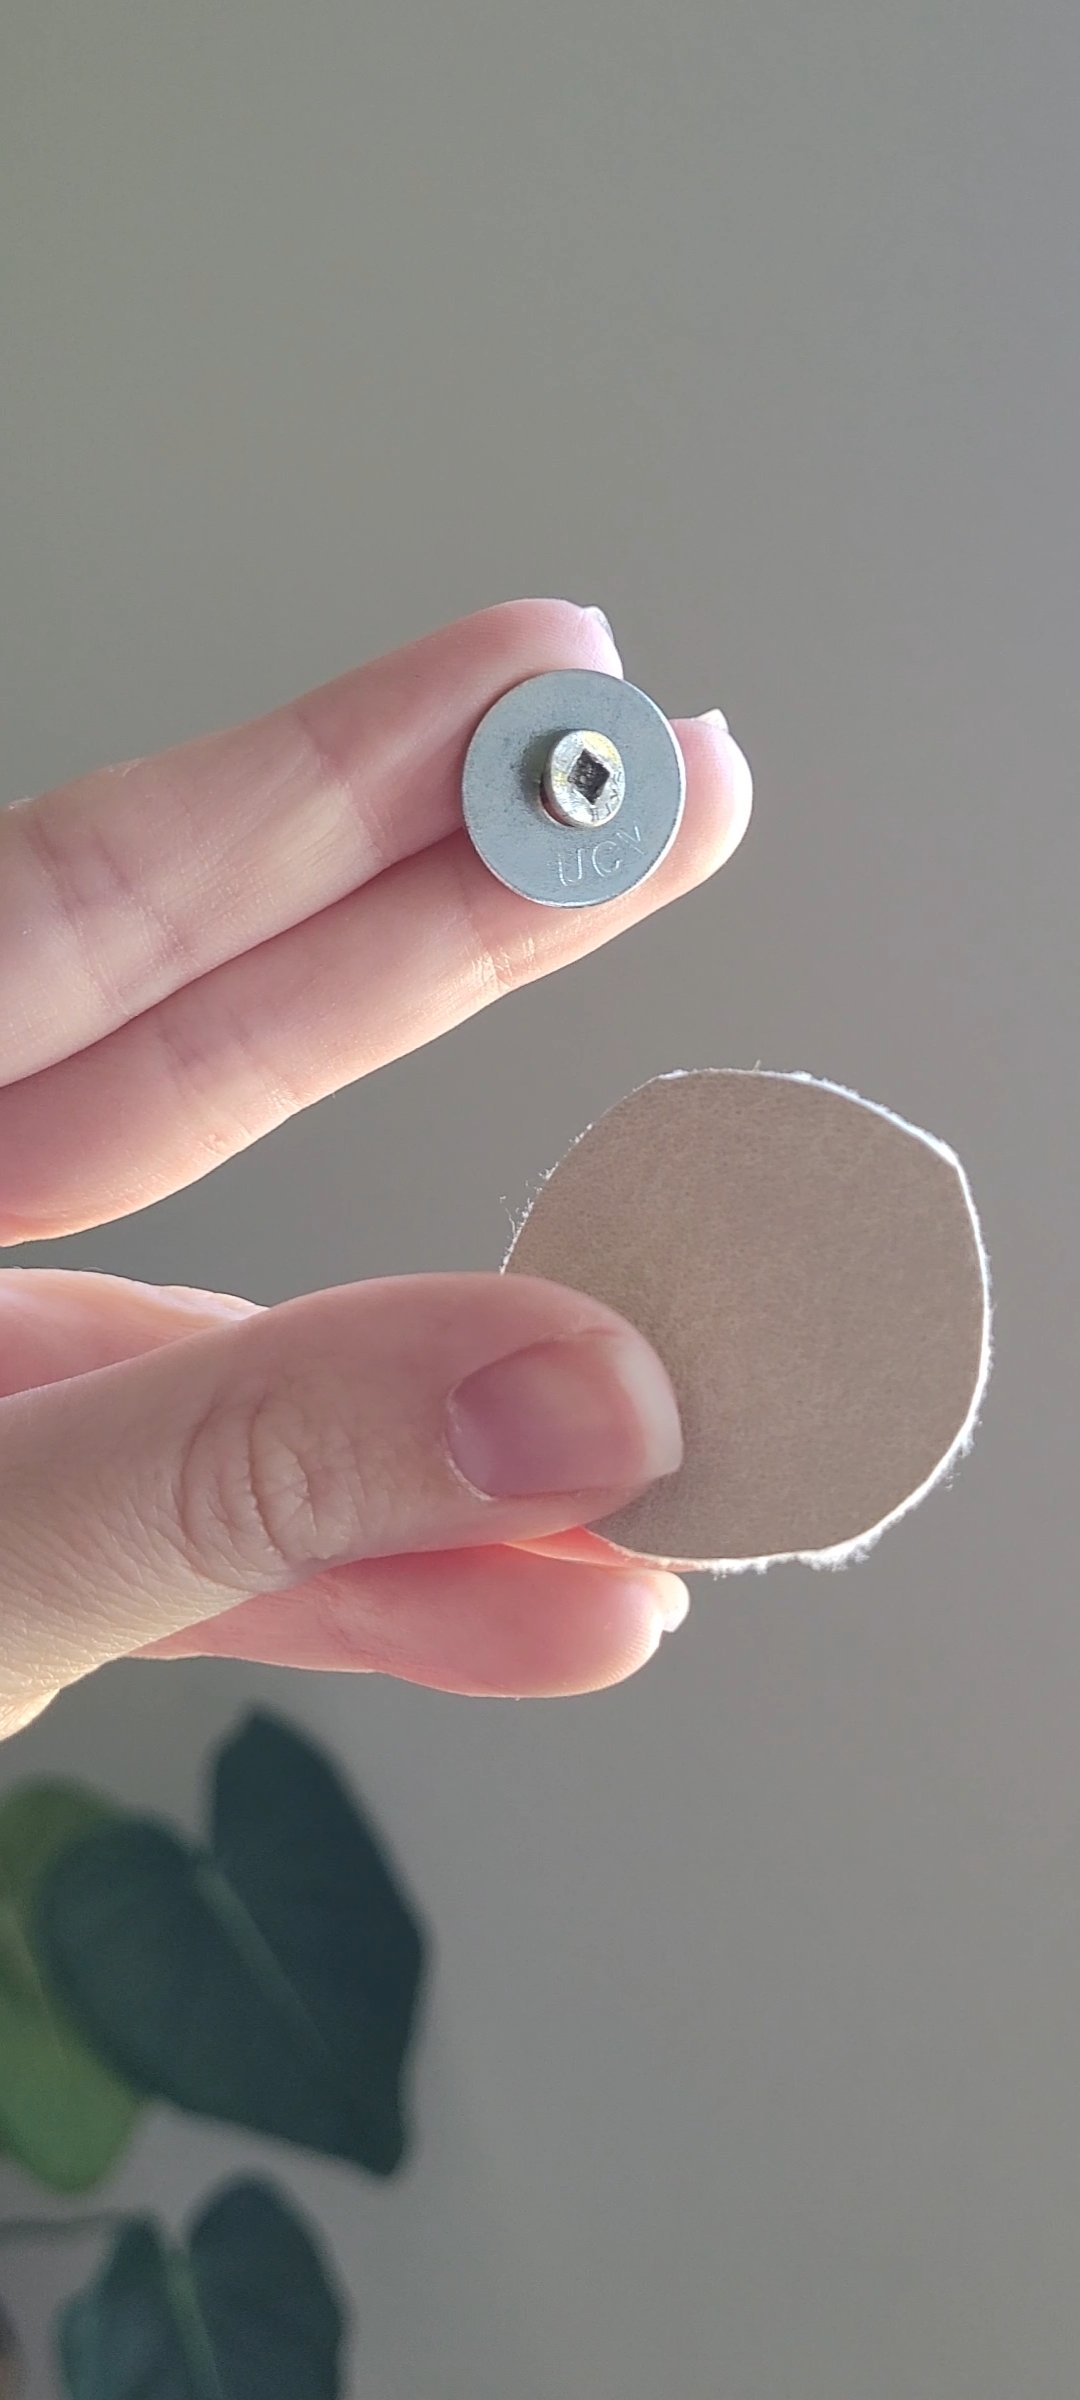
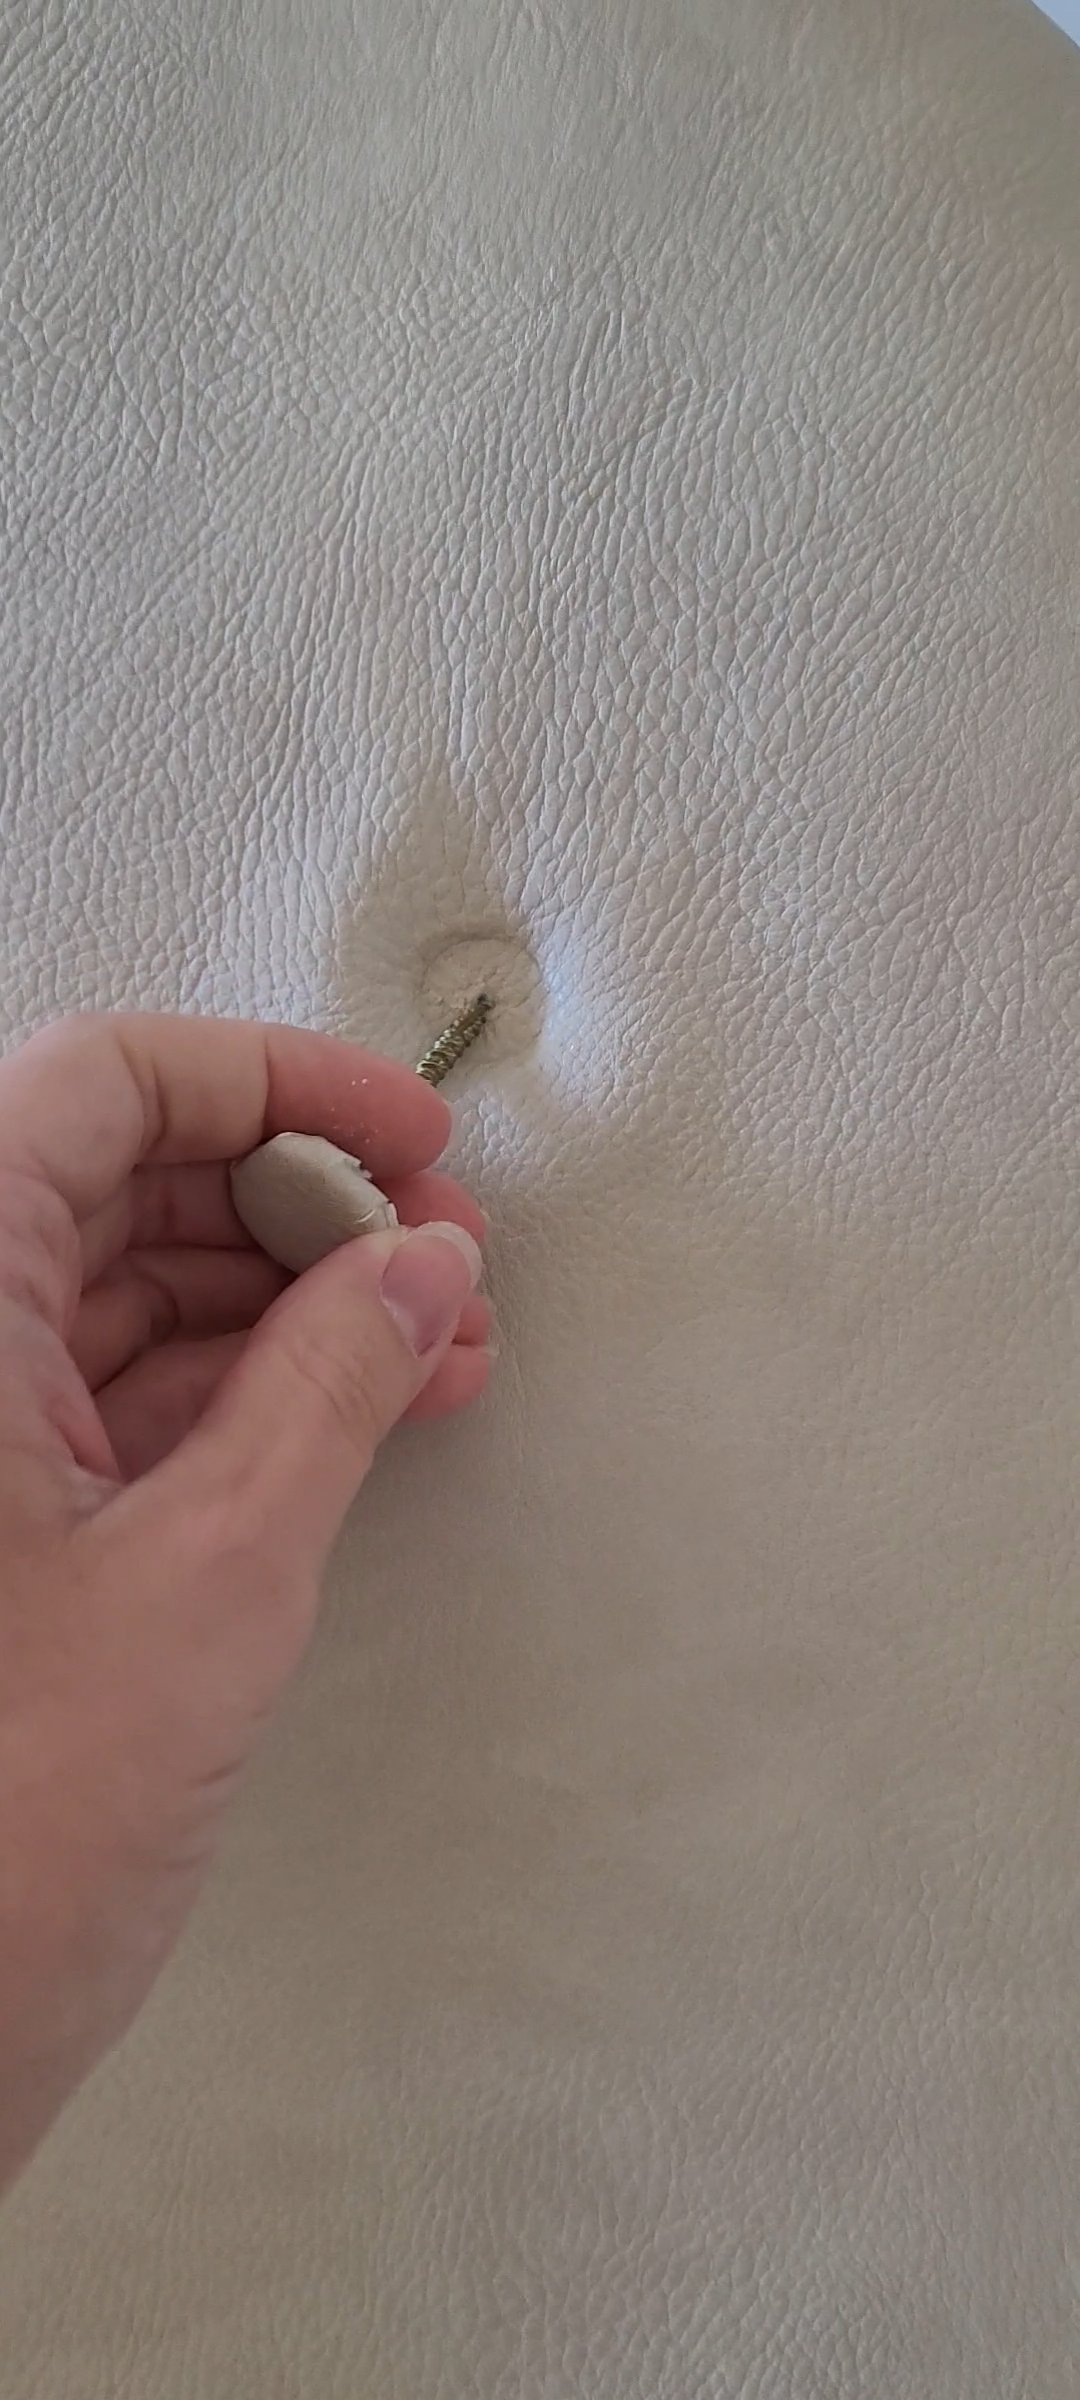
I took this fabric top a step further by adding on faux buttons. If you don't want the buttons all you have to do is screw the top on from under the top of the already put together base. BUT if you want to add the buttons on this is how. I took the 3” screw and put a washer on it. Then, I cut out small circles on my fabric and hot glued it down to the washer. THEN, this is the hardest part, I pre-drilled a hole where I wanted my buttons THROUGH the fabric into the base top and MANUALLY, yes, screwed the button screw, we'll call it that, into the base.
And you're done! I hope this tutorial makes sense, I tend to not think through things well, ha! Overall this project took me a couple hours to make. If you liked this make sure to share it and follow me on Instagram for more!
