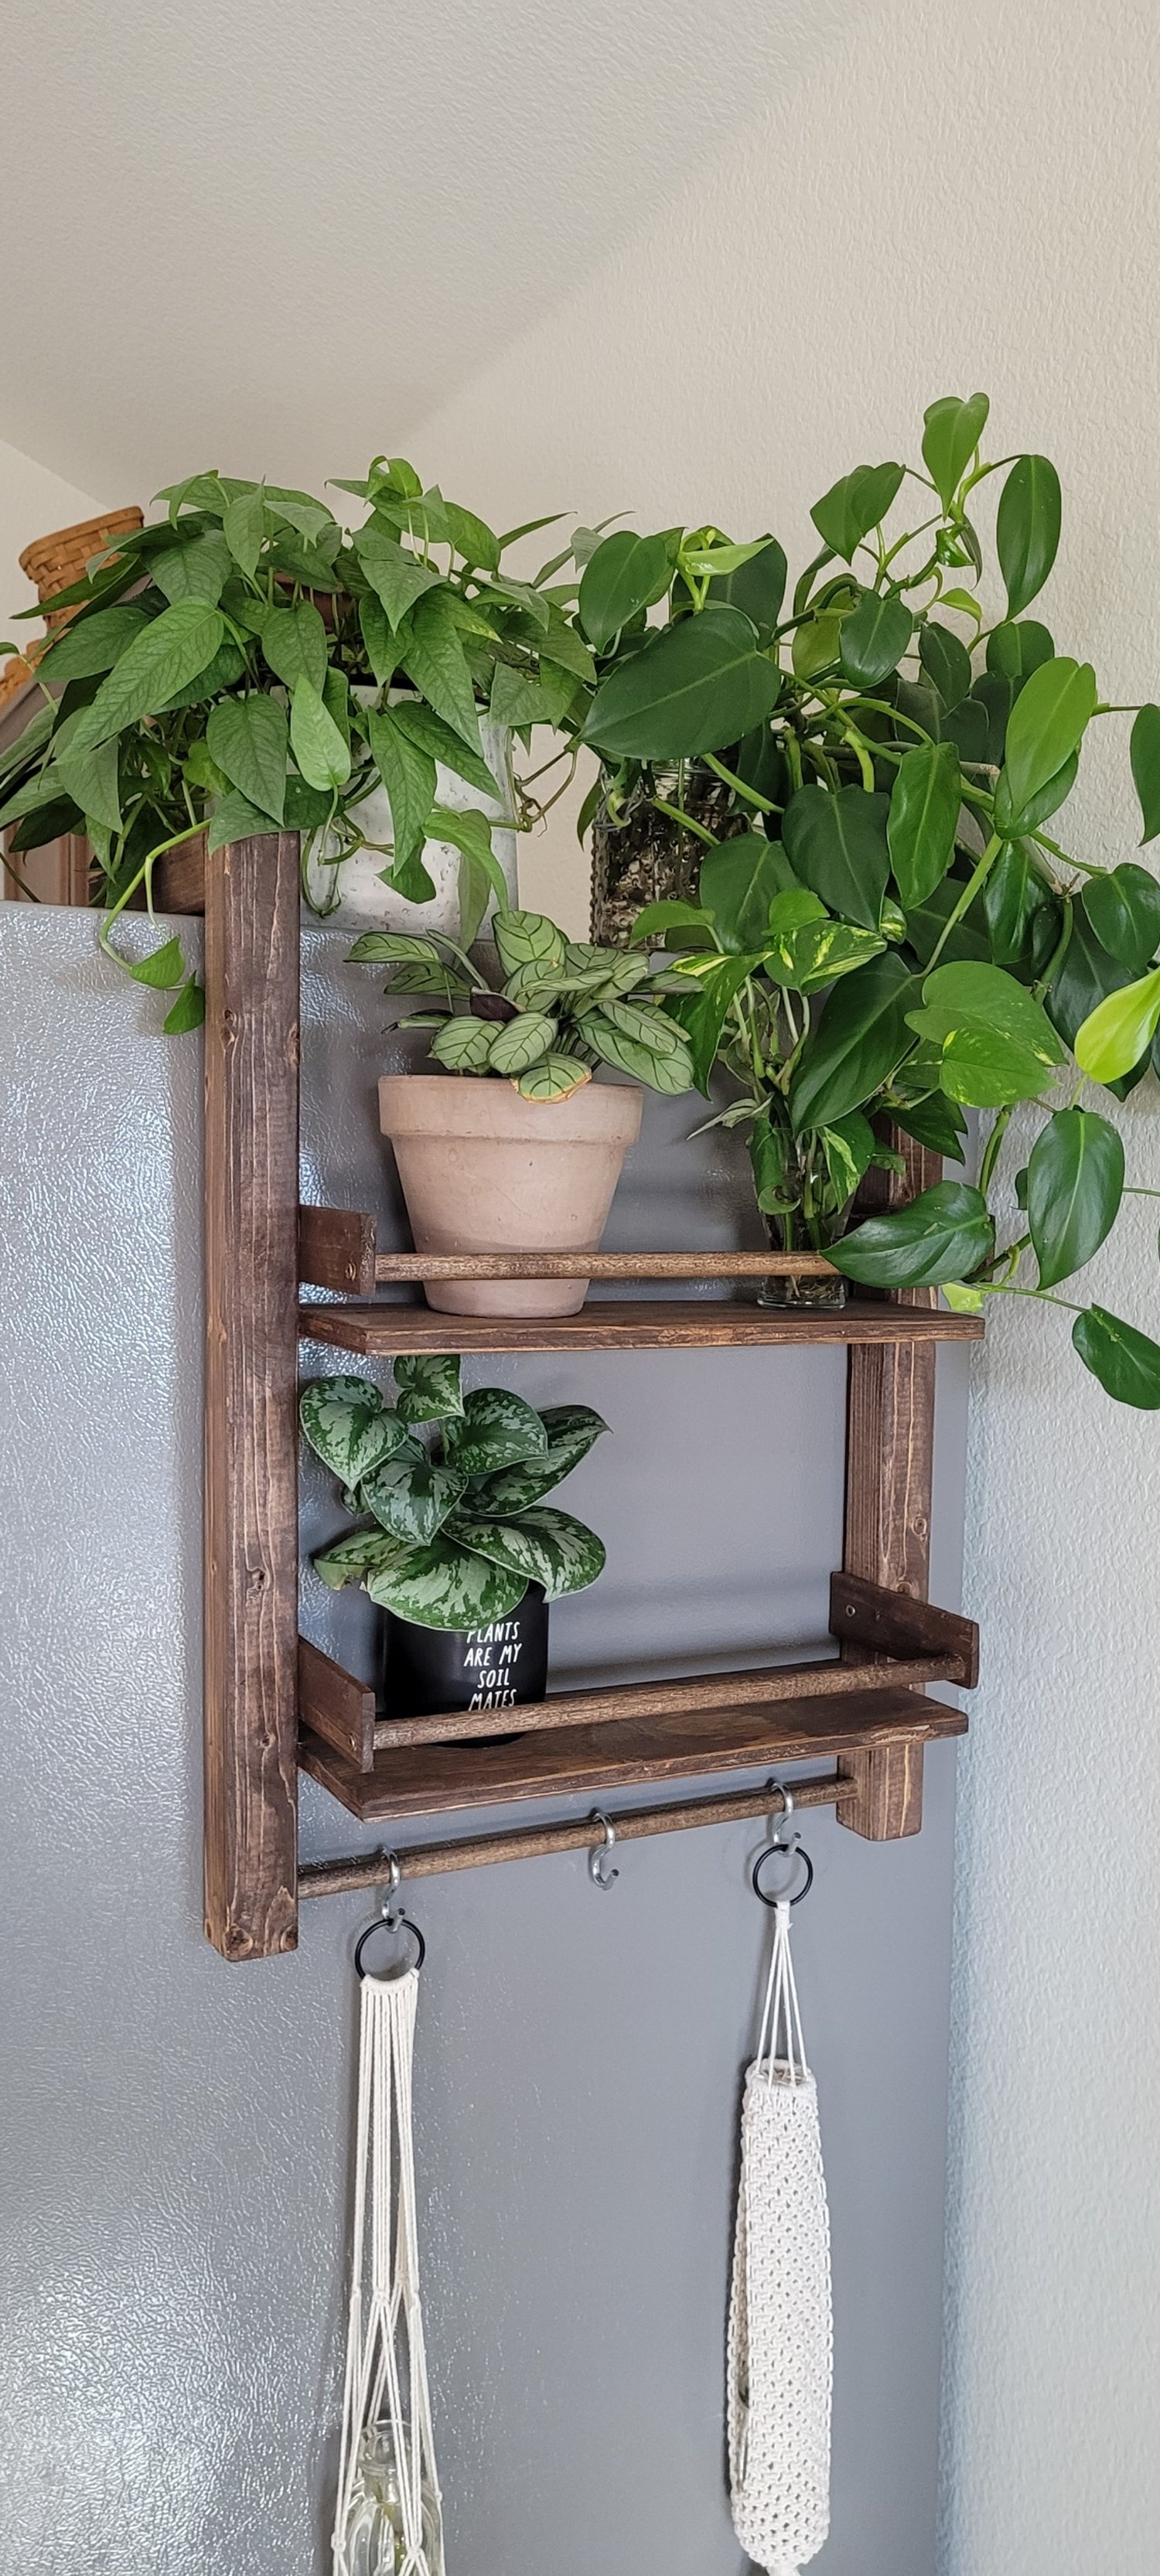
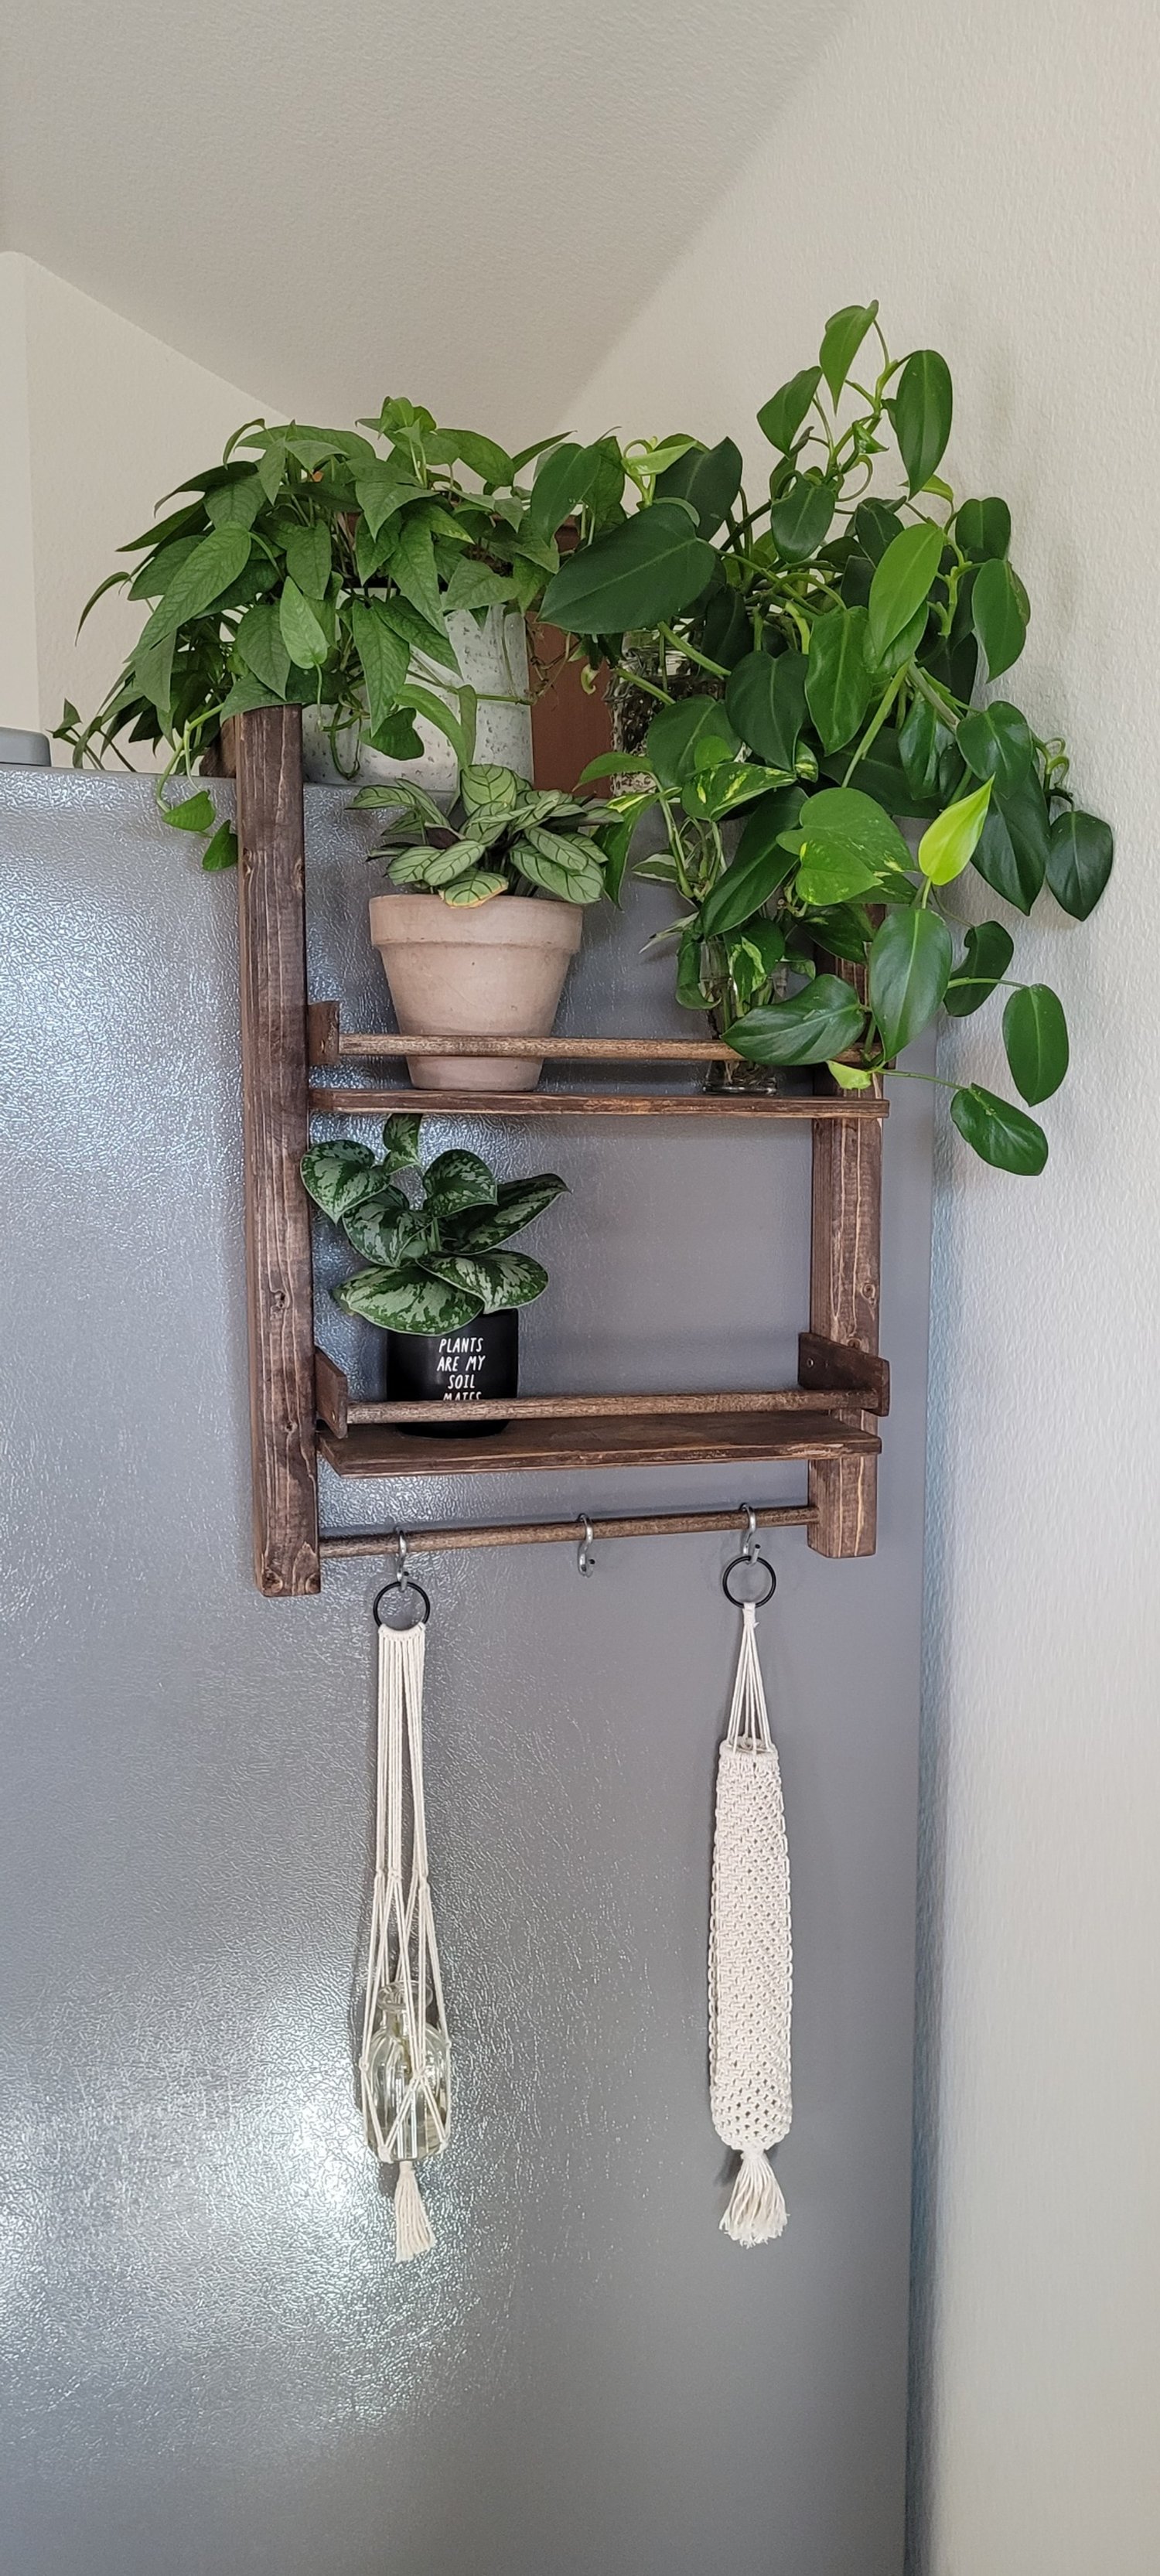
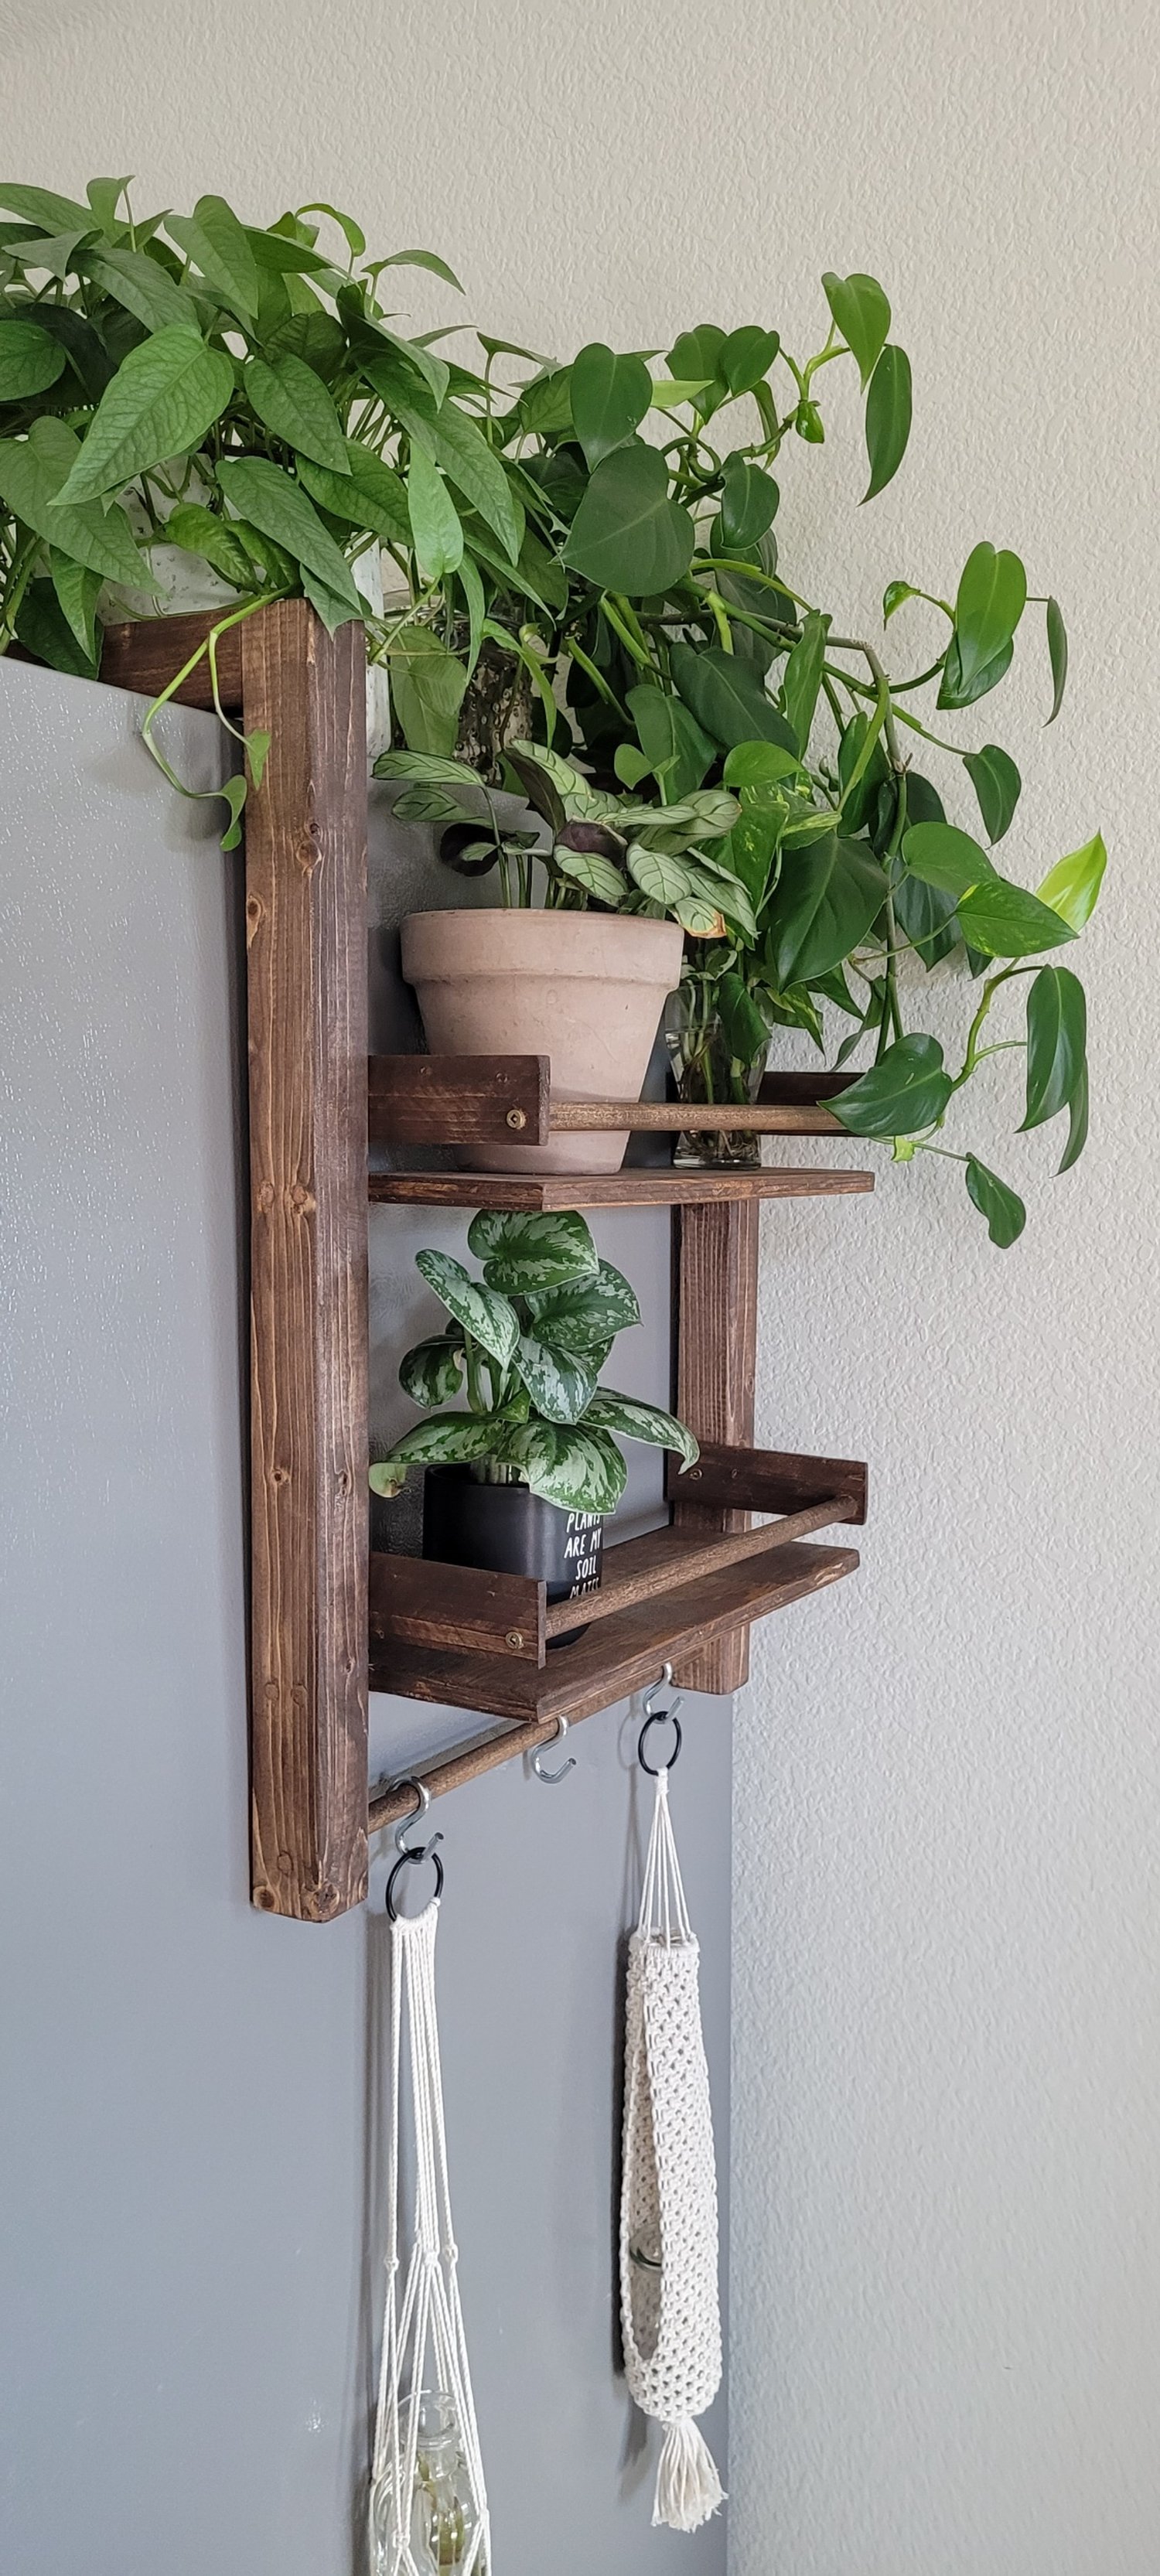
DIY Side of the Fridge House Plant Shelf
We're currently in a rental home that doesn't allow you to nail anything into the walls so I'm constantly trying to figure out where to place all my plants. There's one spot in the house, the side of the fridge, that gets great afternoon light and I kept looking at it thinking, “how do I hang a plant there” haha! So I found a solution, side of the fridge shelf! Now, they do sell magnetic shelves that you can stick to your fridge and some fridge hanging shelves, but they’re mostly for holding spices and too small for any plants to sit on. The shelf I made will hold pots up to 4” big.
I will say, if these instructions seem a little hard to follow it's because I planned this out while I was making it, ha!
NOTE: I didn't realize that the top of our fridge bowed out, so the shelf doesn't sit right… I keep it in place by putting my pots inside the top posts to where they hit the top dowel and keep held where it is. Just check your fridge to make sure it's flat and that the shelf will hang properly.
WHAT YOU'LL NEED:
(2) 22"x1.5" - SIDE BARS
(2) 10"x1.5" - TOP BARS
(1) 5/8"x14" Round Dowel - TOP DOWEL
(2) 14"x5"x0.45" - SHELVES
(4) 5"x1.25"x0.45" - SHELF ARMS
(2) 0.5"x13.75" Round Dowel - SHELVES
(1) 0.5"x14" Round Dowels - BTM HANGER
TOOLS:
- Miter Saw (Can also use a table saw, circular saw, or any saw to cut to size!)
- Kreg Drill (optional)
- Screw Driver
- Drill Bits (Optional)
- Wood Filler

STEP 1: SIDE BARS + TOP BARS
Using a Kreg drill, drill holes into the top bars, then connect them to the side bars by using 2 #9 2.5" screws. If you don't have a Kreg drill, you could use L brackets to attach the two together or just screw straight threw the front of the side bars into the top bars.

STEP 2: TOP DOWEL
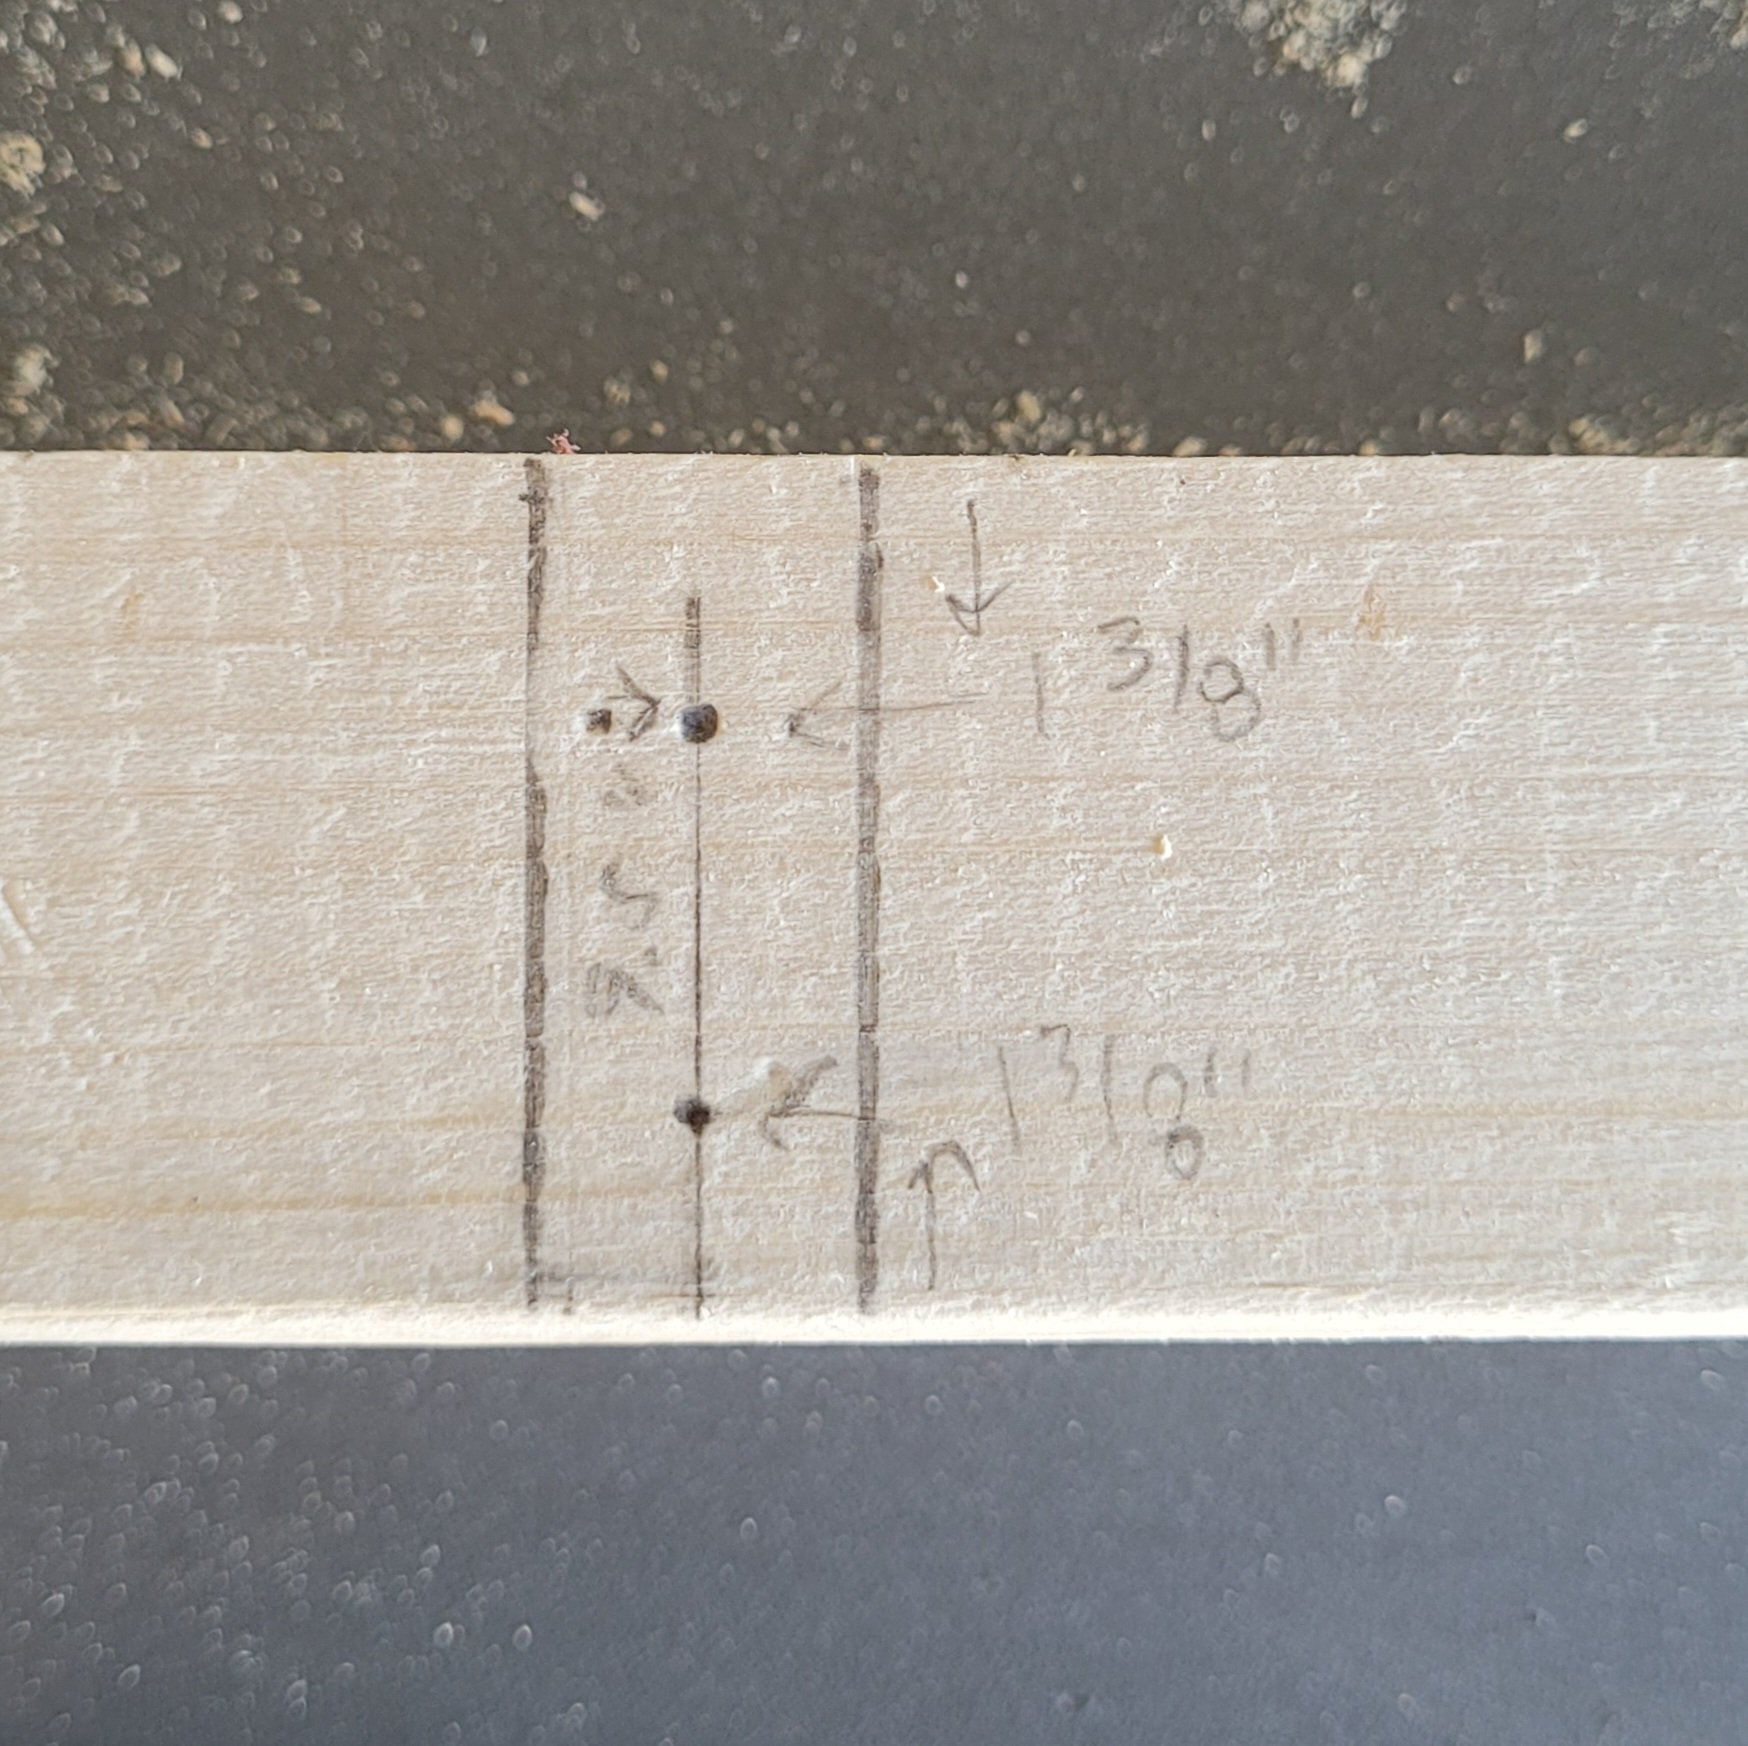
Screw the 5/8" dowel into the top bars using 2 #8 7/8" screws. I countersunk the screws by drilling a hole slightly smaller than 7/8" into the side of the top bars and then screwed the bars into the dowels (see photos in Step 3 to see how I countersink holes). You can can use longer screws to avoid countersinking the screws. Later I filled the hole with wood filler.
STEP 3: TOP SHELF
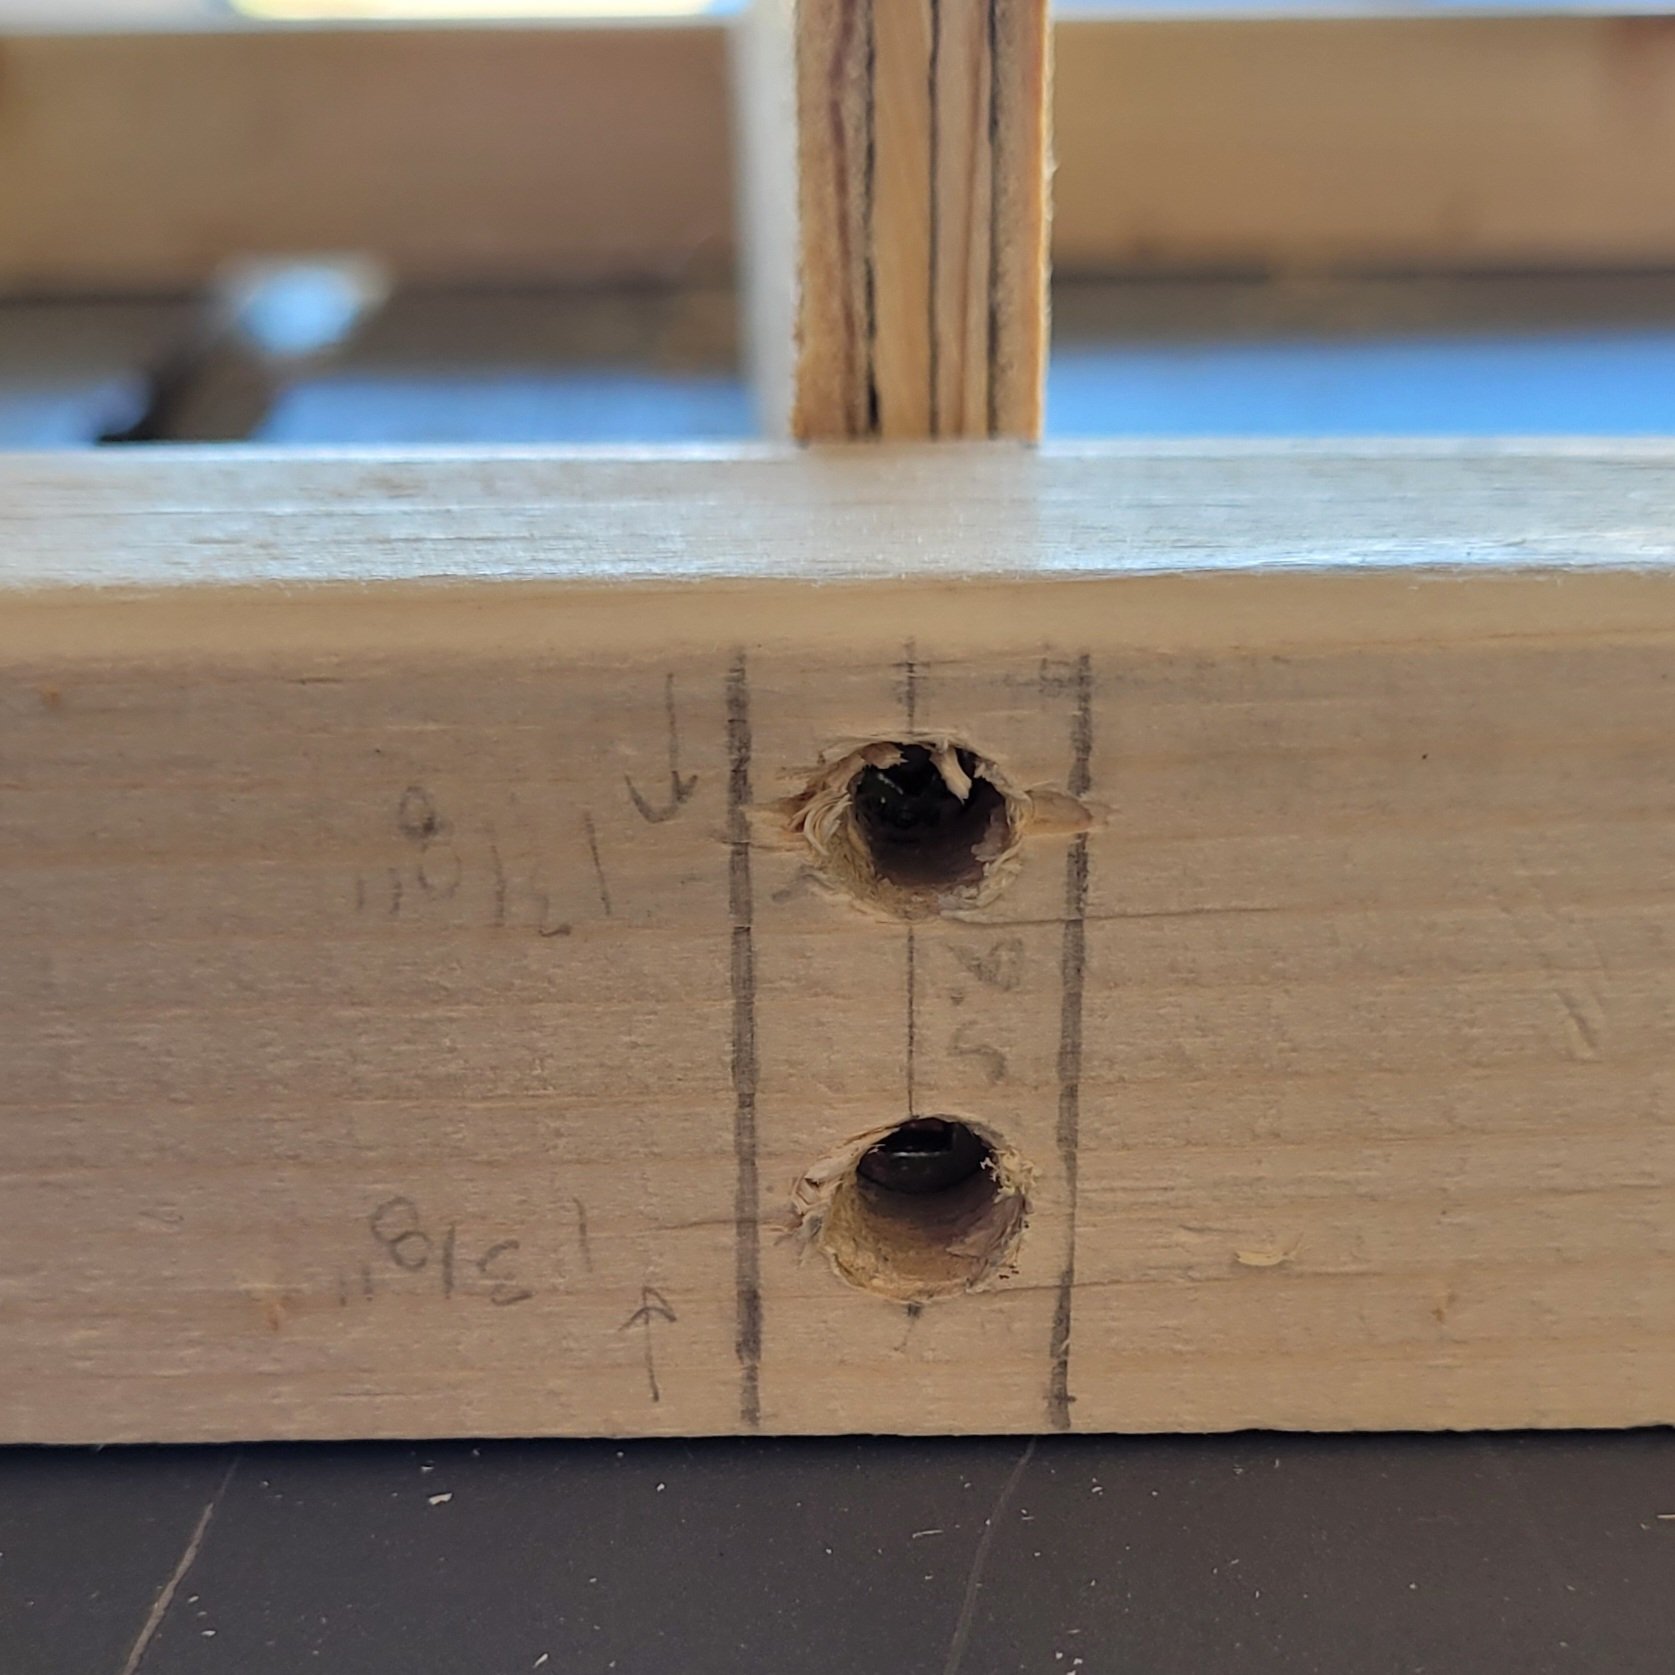
Place the shelf 9.25" from top of the 22" post to top of the shelf using 4 #8 7/8" screws; two screws per side. I also countersunk the holes for the shelves. Again, you can use longer screws, but you'll see the screw head if you do. To countersink screws I make sure that at least half the screw is in both boards (I think the actual rule is to have at least an inch of screw into what you're screwing, but I'm not a professional!). To ensure this I place the screw half way off the board and then placed my drill bit flush with the head of the screw, and marked with red tape where the drill bit hit the top of the wood (hopefully that makes sense!). This means that I only screw down to where the red tape is. Once I have that hole drilled large enough, I can screw the boards into the side bar. I countersunk two holes to attach the shelf. One hole 1.375” from the top and bottom (see photos below).

STEP 4: BTM SHELF
Place the shelf 3.625" from the top of the shelf to the bottom of the 22" post using 4 #8 7/8" screws; two screws per side.

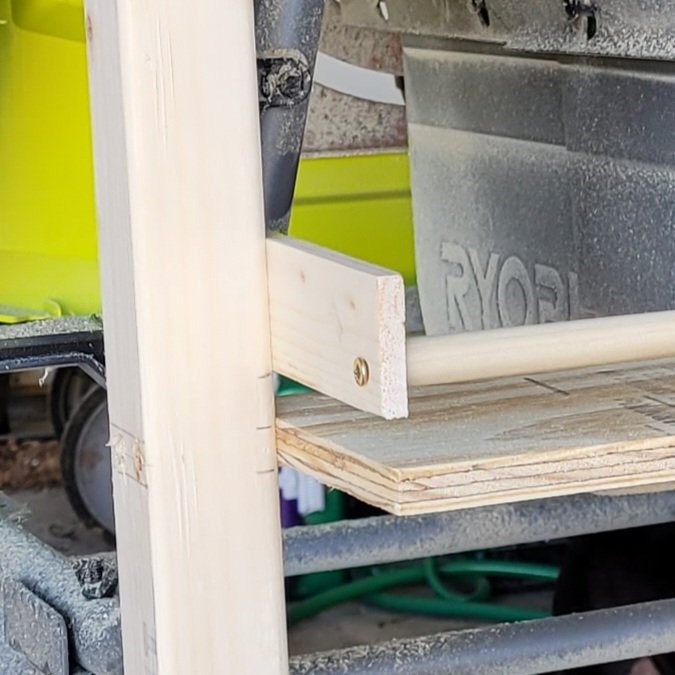
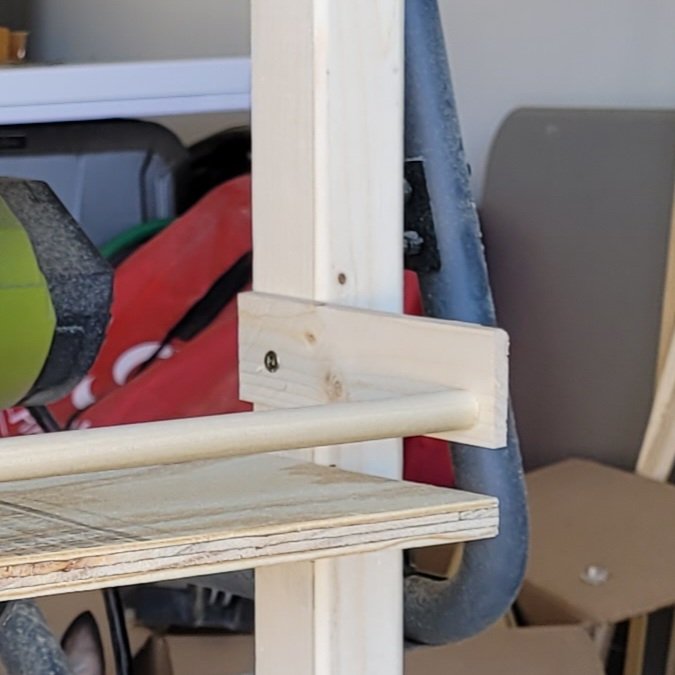
STEP 5: SHELF ARMS
Place 0.5" from the top of each shelf and then place the 0.5"x13.75" dowels in the bottom corner of the side arms. I used #8 1" screws to attach the arms to the side posts (screwing them on from the inside of the shelves) and then used #8 1" screws to attach the dowels to the shelf arms.
STEP 6: BOTTOM & TOP DOWEL
Place the 0.5"x14" dowel 1" from the bottom using 2 #8 7/8" screws; 1 screw per side. I did the same thing when attaching the top dowel. The reason I attached the top dowel to the two arms (which I don't have a picture of) is because our fridge bubbles up at the top and didn't sit flush. So now I have a plant sitting before the bar to hold it up.
Once you've completed all these steps you can fill in the holes with wood filler and sand down any rough areas.

STEP 7: PAINT OR STAIN!
Once it's painted or stained, you're ready to hang! And add plants. For the bar on the bottom, I had S hooks that I put on it so I could hang some of my macrame hangers.
I really love how this turned out AND that I have a place to put more plants. Plus, it fills dead space that was bothering me and gets the perfect amount of light.